Screen printing, also known as silk-screening, is a popular method of creating prints on various surfaces such as fabric, paper, glass, and more. It involves pushing ink through a mesh screen onto a substrate to create a design. Here’s a beginner’s guide to screen printing using the silk-screening technique:
Materials and Tools:
- Screen: The screen is a frame with a mesh stretched tightly over it. The mesh is typically made of silk, nylon, or polyester. The mesh’s openness determines the level of detail and amount of ink that can pass through.
- Emulsion: A light-sensitive material that is applied to the screen. It hardens when exposed to light and creates a stencil for the design.
- Squeegee: A tool used to push ink through the screen and onto the substrate. It can be made of wood, plastic, or metal.
- Ink: Screen printing ink is specifically formulated for this process. It’s available in various colors and types (water-based, plastisol, etc.).
- Substrate: The surface on which you’ll be printing, such as t-shirts, paper, posters, or other materials.
- Exposure unit or light source: Used to expose the emulsion to light and create the stencil.
- Design: You can create your design digitally or by hand. Designs with clear, bold lines work best for screen printing.
Step-by-Step Process:
- Design Preparation:
- Create or choose a design.
- If you’re using a computer, print the design on a transparent film.
- Alternatively, draw the design directly on the transparency using opaque materials.
- Screen Preparation:
- Coat the screen with emulsion using a scoop coater or a similar tool. Apply a thin, even layer on both sides of the screen.
- Let the emulsion dry in a dark, dust-free environment.
- Exposing the Screen:
- Place the dried screen in an exposure unit or under a strong light source.
- Place your design transparency on top of the screen, ensuring it’s properly aligned.
- Expose the screen to UV light for a set amount of time. The light will harden the emulsion except where the design blocks the light.
- Rinsing and Stencil Creation:
- After exposure, rinse the screen with water to wash away the unexposed emulsion.
- The areas covered by your design on the transparency will remain as a stencil, allowing ink to pass through.
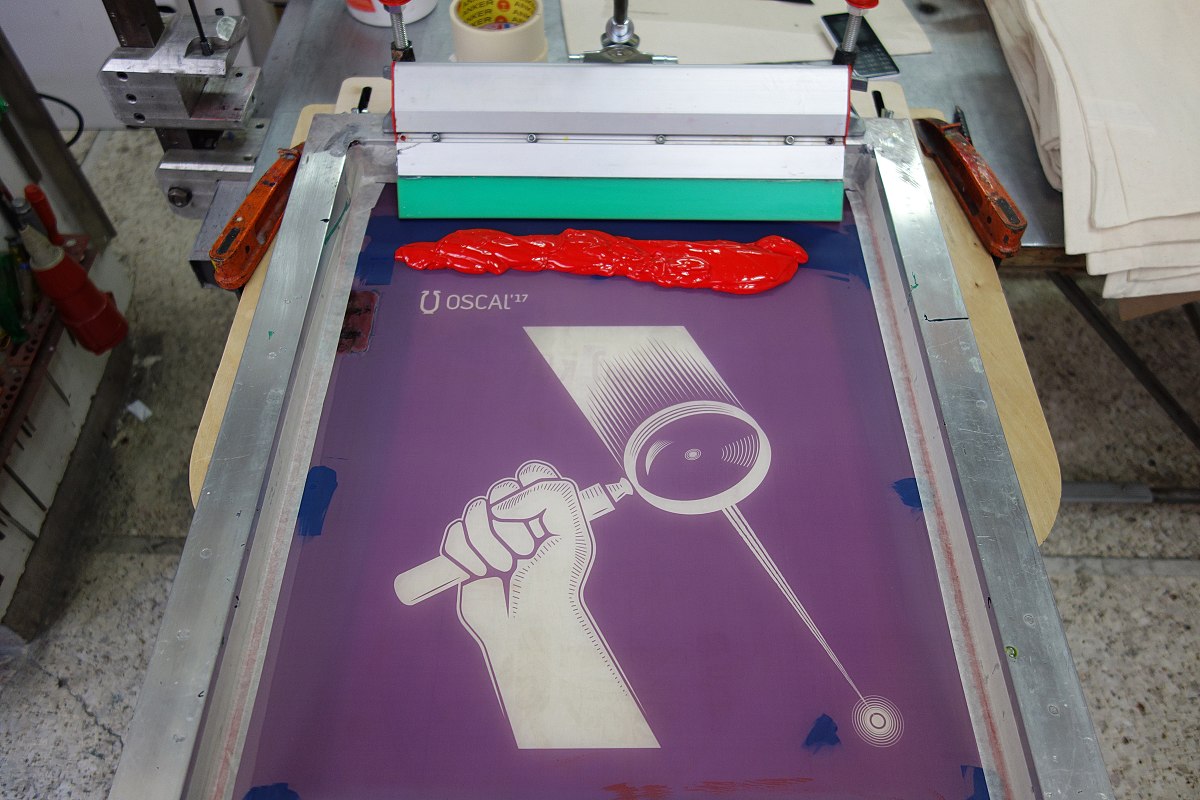
- Printing:
- Place your substrate on a flat surface and secure the screen on top of it.
- Apply ink at one end of the screen, above the design.
- Hold the squeegee at a 45-degree angle and pull it across the screen, forcing ink through the mesh and onto the substrate.
- Lift the screen carefully to reveal the printed design.
- Drying and Curing:
- Let the printed substrate dry completely.
- If using plastisol ink, heat-set the print using a heat press or conveyor dryer.
Remember that practice makes perfect, especially when it comes to screen printing. You might encounter challenges like registration (aligning layers of color) or adjusting ink consistency, but these can be overcome with experience. As you become more skilled, you can experiment with multicolor prints and different types of substrates.